Elysium’s Knot Garden . . . .
My wife and I always make a point of visiting gorgeous public gardens when traveling. The beauty is breathtaking and inspiring! Of particularly fascination for me are those places that include a “knot” garden. “Knot,” meaning that two or more varieties of plants are arranged in an intricate pattern and trimmed such that they appear to be a ribbon passing over-and-under each other – giving a knot effect. I believe this was first done in Elizabethan England.
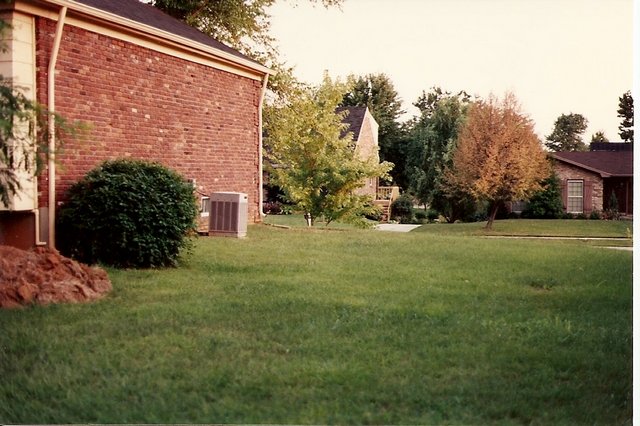
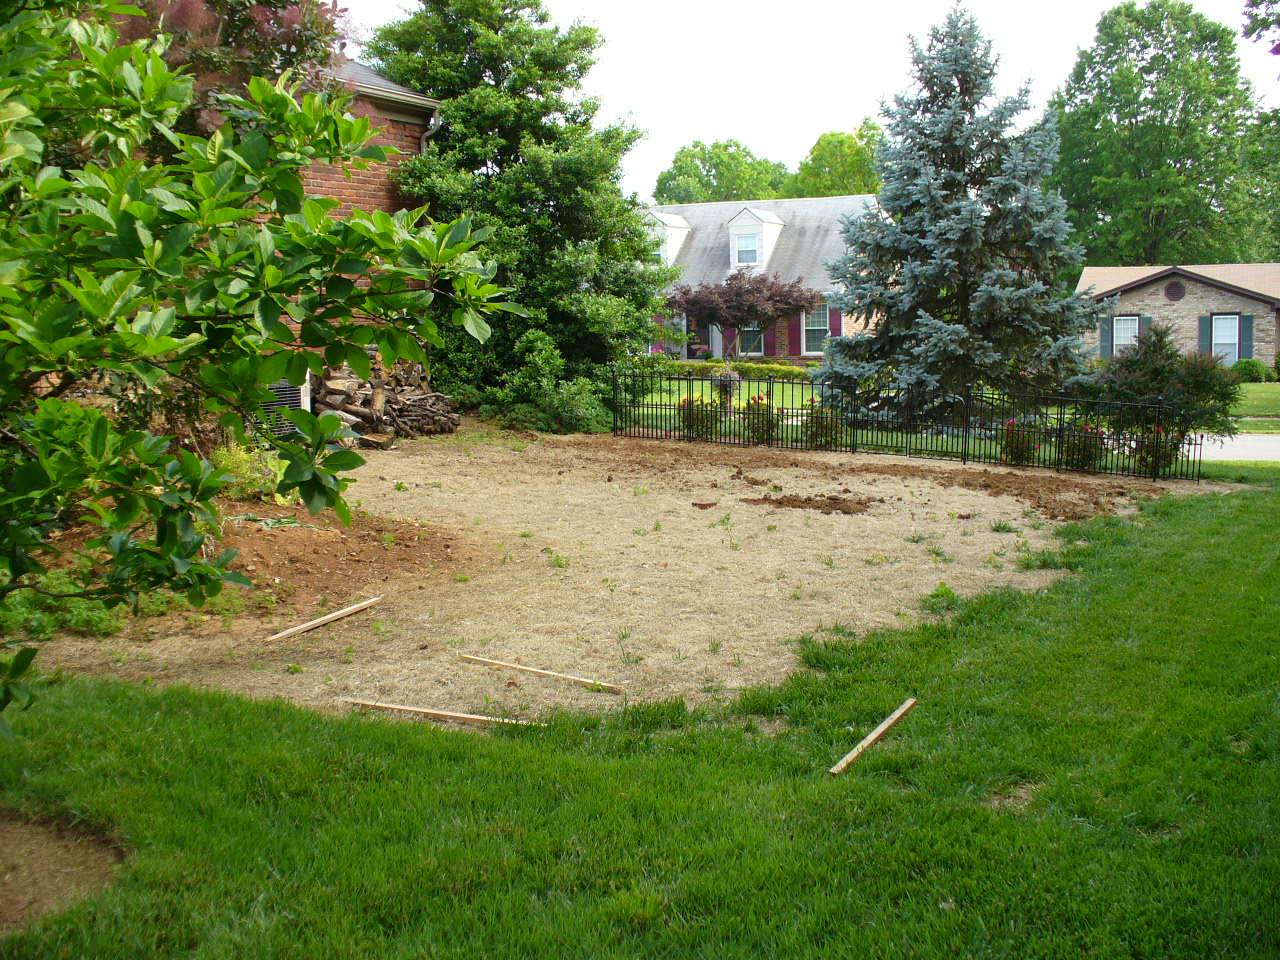
I always wanted a knot garden of my own, so . . . . I turned the useless side of my house into one. For those interested, here are the steps and timeline:
1) Choose a pattern that will work in the space identified for the knot garden. I Googled “knot garden” images and found numerous ideas. Most seemed to work best for large open areas. Mine was somewhat small by comparison, so I chose a relatively simple design, and decided to place it in a diamond orientation for my application.
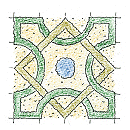
2) Design a layout for your entire garden area around the knot. Will it have sidewalks, and if so, in what design and configuration? What other features do you want in and around the knot portion of that garden – if any? Parterres (symmetric planting beds)? How will you create the boundary around the garden area – hardscape (such as fences or walls) or softscape (such as long rows of manicured shrubs)? Maybe you decide to keep it as simple as possible and cordon off the knot by itself in some part of your yard – without a surrounding garden? Rough sketch up ideas on paper. Once you decide on what pleases you, take dimensions on the entire area you want to include, and create a scale (or near-scale) drawing on paper.
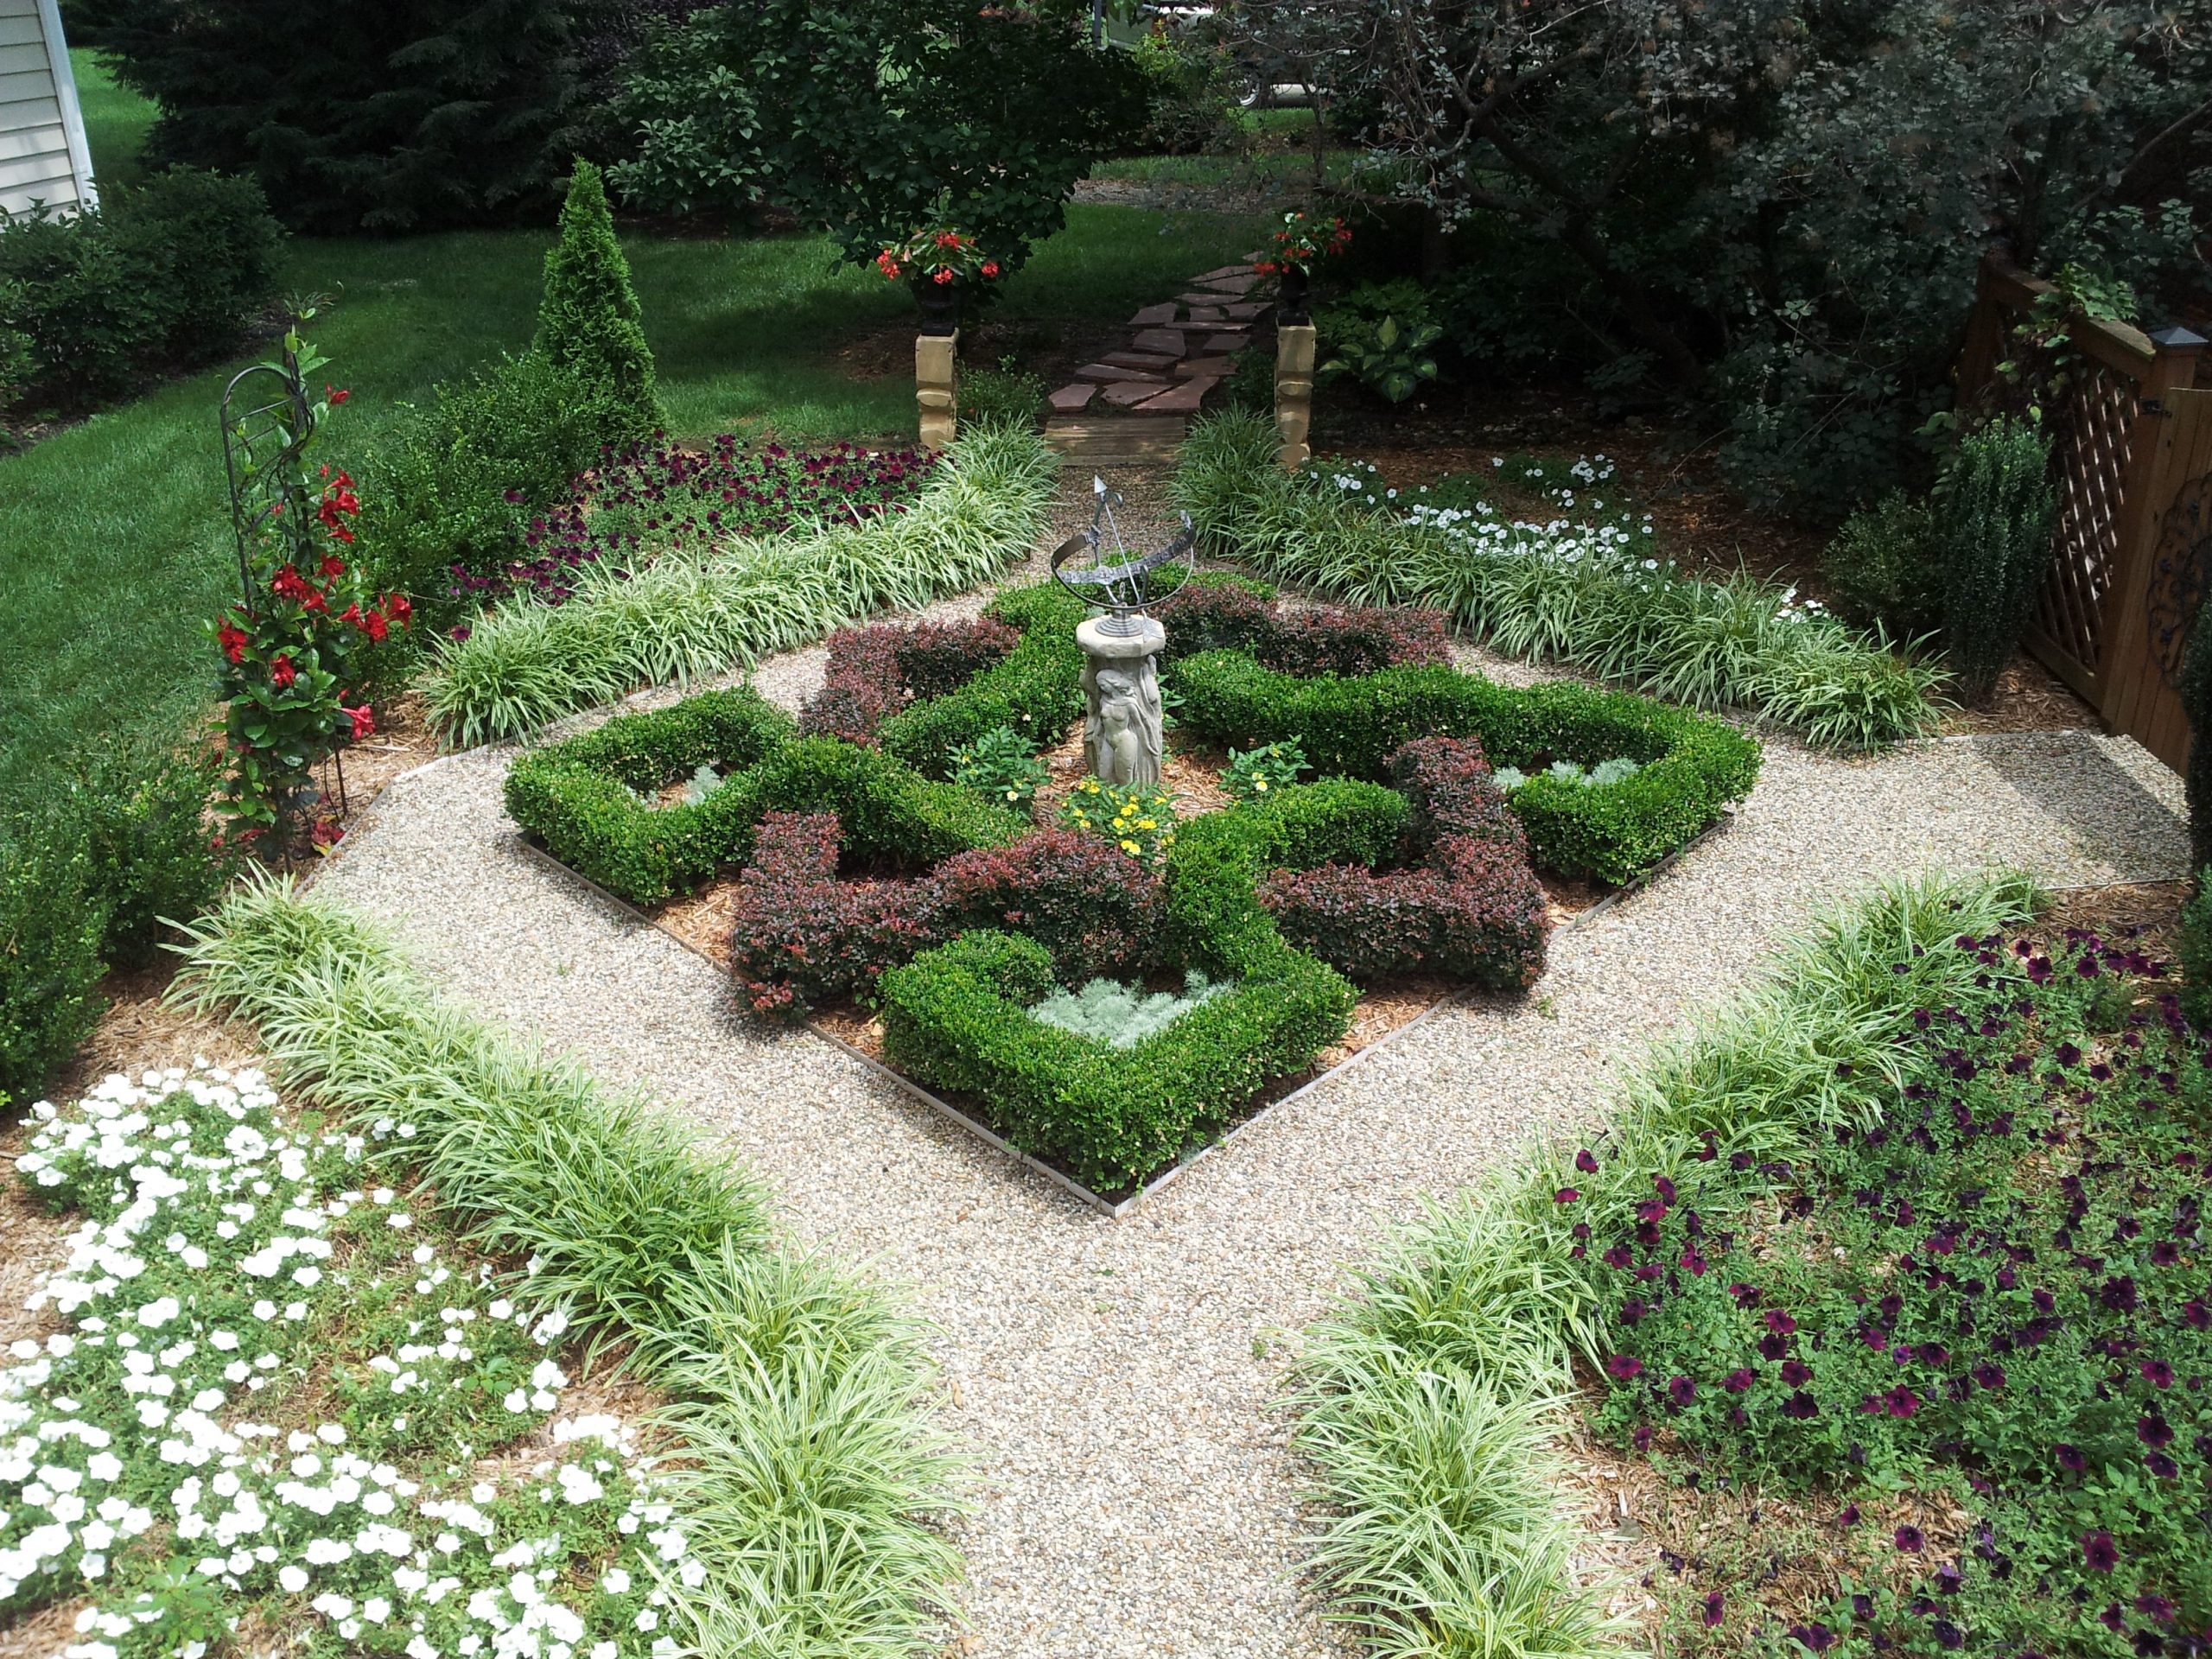
Walkways and surrounding beds: I decided on four parterres with a pea-gravel sidewalk. Brick would look more formal and finished, but would require more expense and effort than I desired. I always have the option of going that route later if I desire.
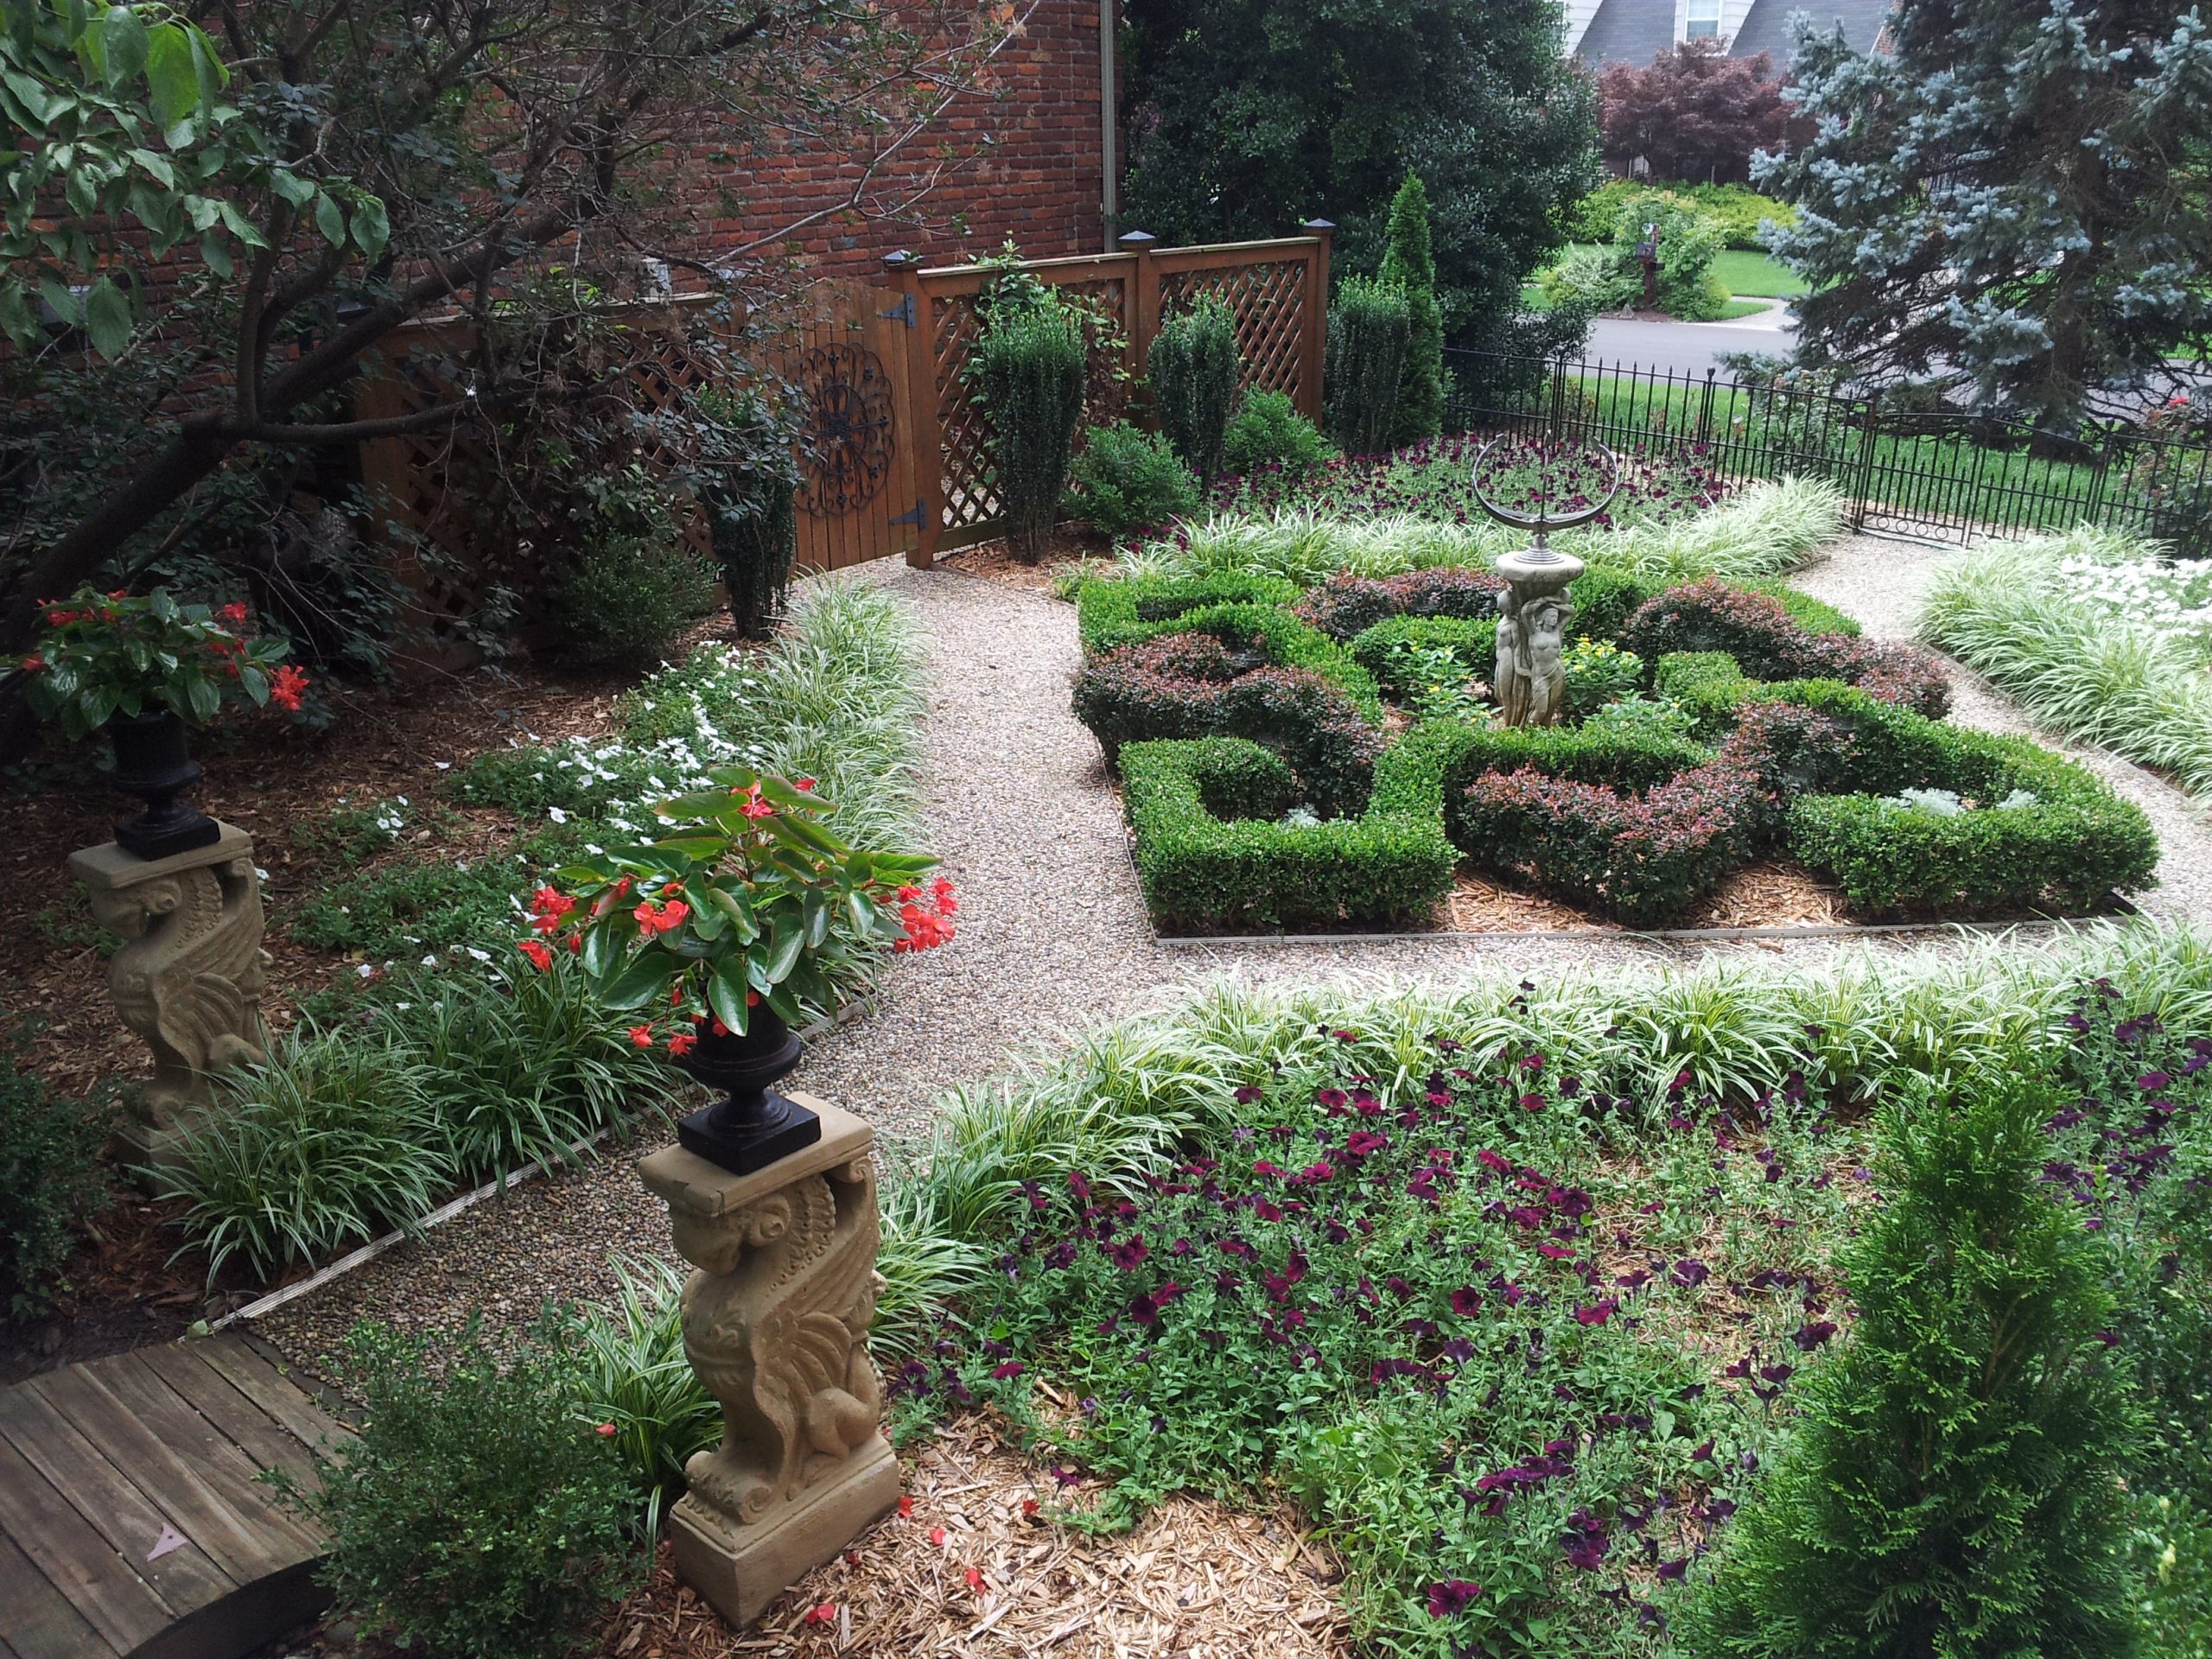
Boundary walls: Next to the house, I wanted a concealing type fence to hide my heat pump, firewood rack and compost bins, so I went with treated lumber with a gate. For the front-facing boundary we decided on a small iron-looking fence with gate. Painted steel was cheaper and easier to get. I may replace it with actual iron at some point. For the side facing the rear yard, we went with a river-rock dry stream bed, which carries drainage away from a nearby downspout. For the side toward my next door neighbor we went with a row of shrubs.

3) Decide on the plants to use for the actual knot formation. Again, I researched on Google to find out what plants are typically used, the pros and cons of each, and which ones appealed to me for my design. Typical knot garden plants to choose from include: dwarf boxwood, santolina, wall germander, dwarf hyssop, rosemary, crimson pygmy barberry, winter savory, dwarf yew, purple sage, and several others. They fall into either the herb or dwarf shrub categories.
I decided on Dwarf Boxwood (Buxus Microphylla ‘Winter Gem’) and Pygmy Barberry (Berberis Thunbergii ‘Crimson Pygmy). I liked the fact that I could more tightly control their shapes via trimming versus some of the herbs. Plus they are winter hardy.
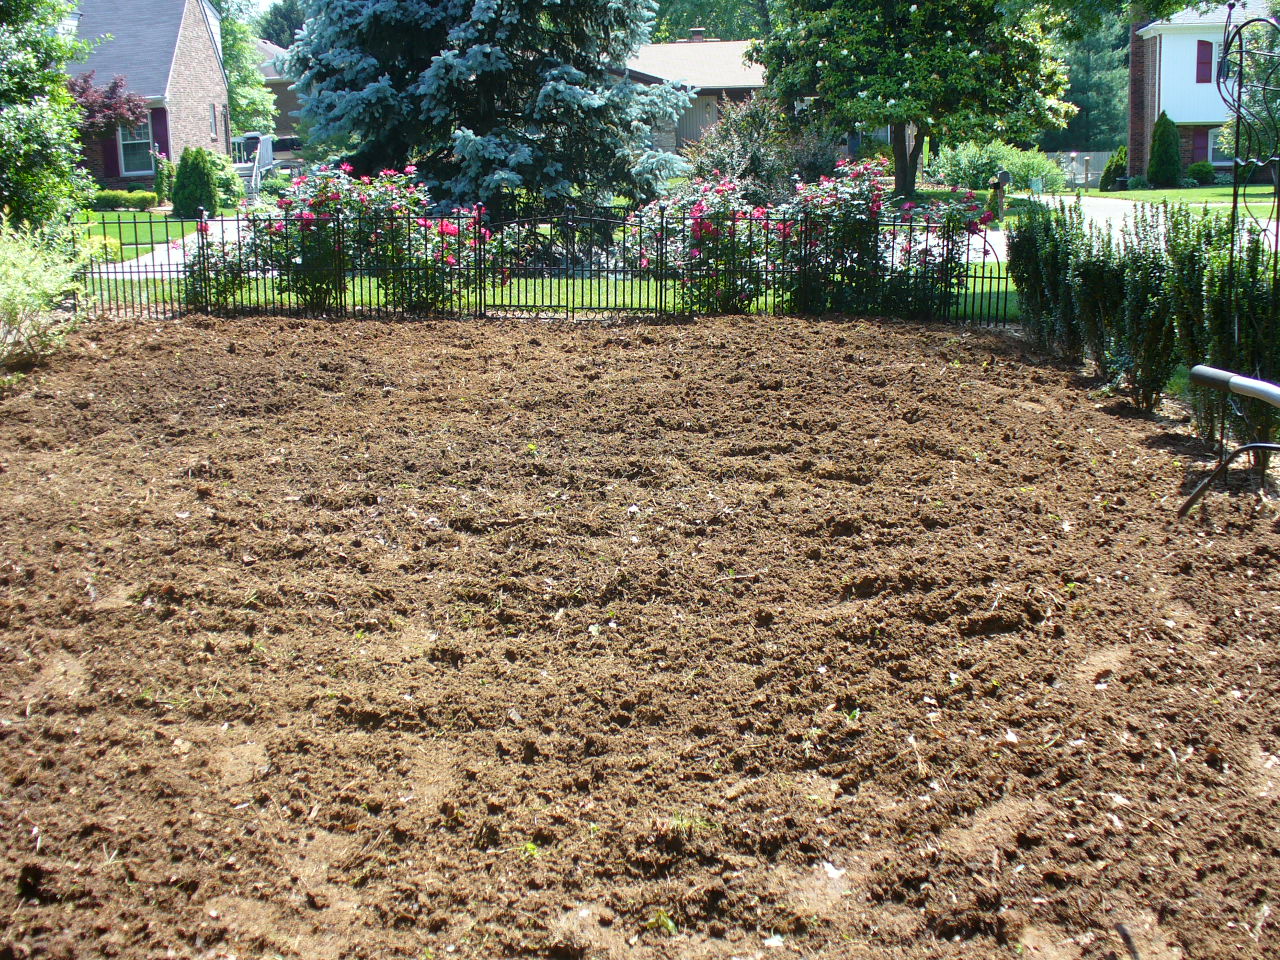
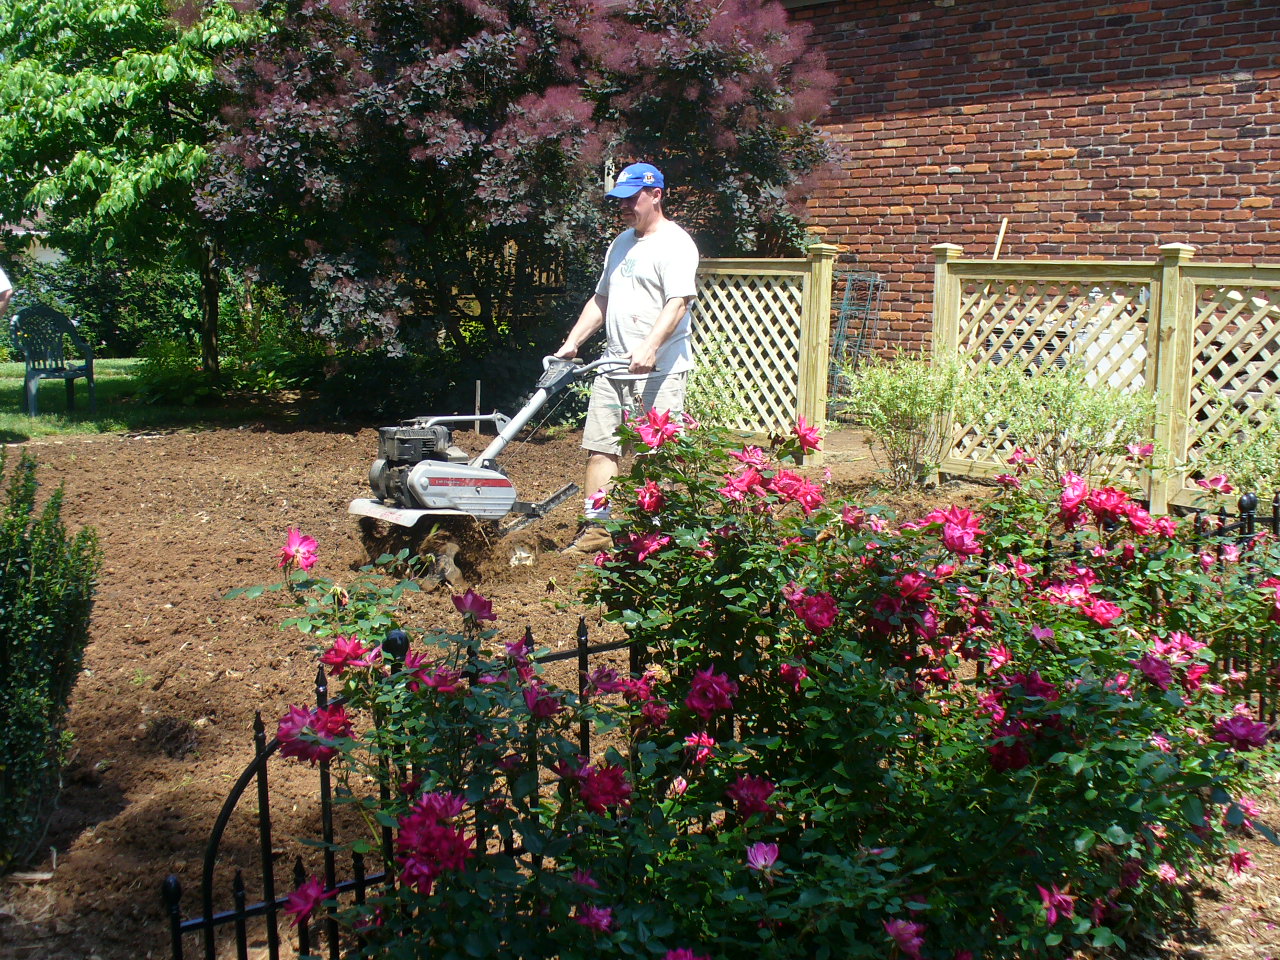
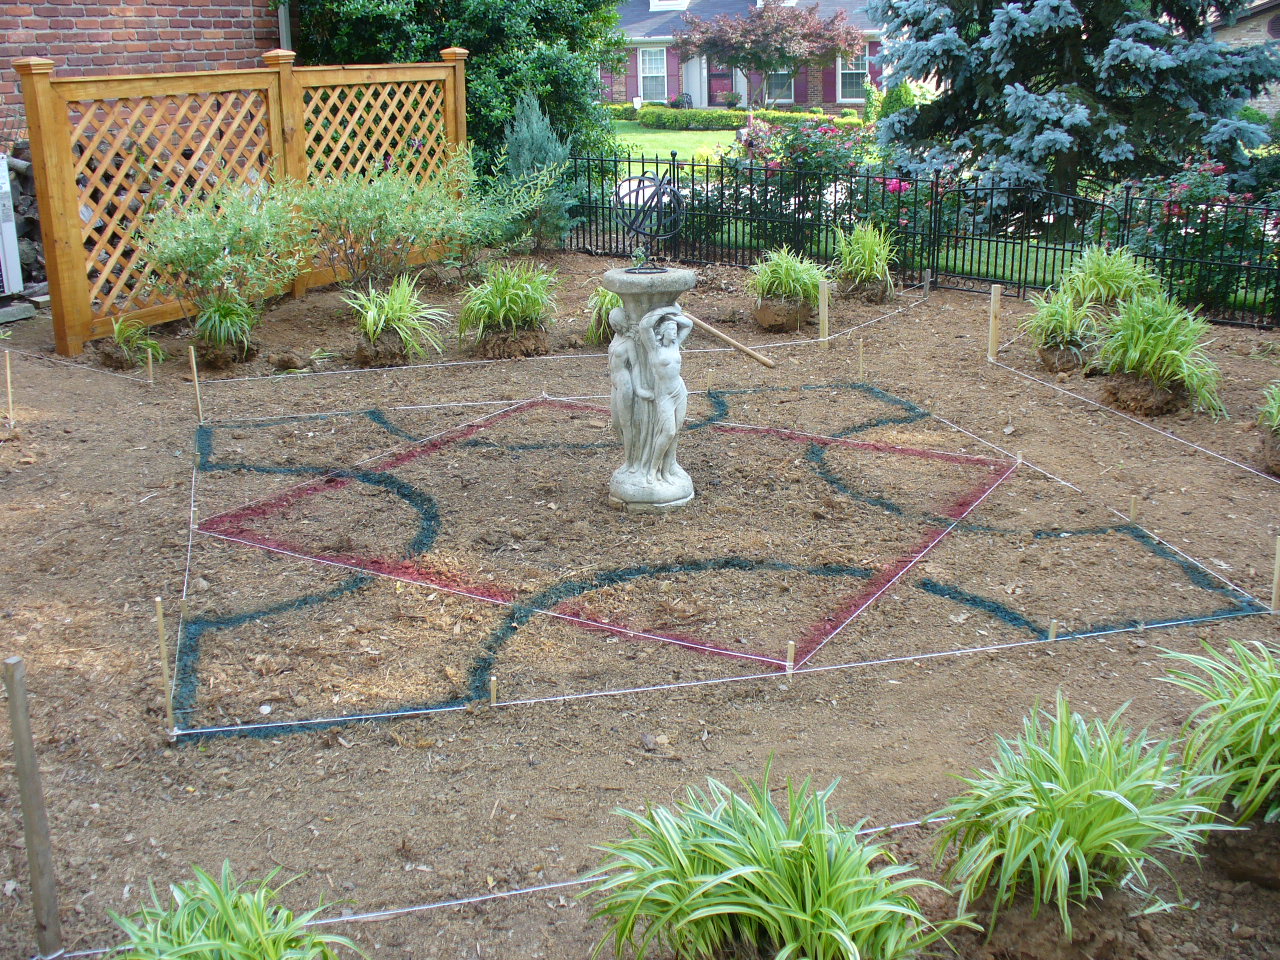
4) Prepare the site. Kill the grass, till the ground, layout the site. Using stakes and string layout the garden plan on the ground. I decided to put in my fencing and boundary shrubs before tilling.
5) Layout your design on the ground with stakes and string. I chose to spray paint the knot pattern exactly where the plants would go, but that’s not necessary. Plant miscellaneous perennials where you planned. We chose to line the walkways with variegated liriope moved from elsewhere in our landscape. I compressed the dirt where the sidewalk would be located (here in Kentucky we call that “tamping” the dirt down 🙂 ).
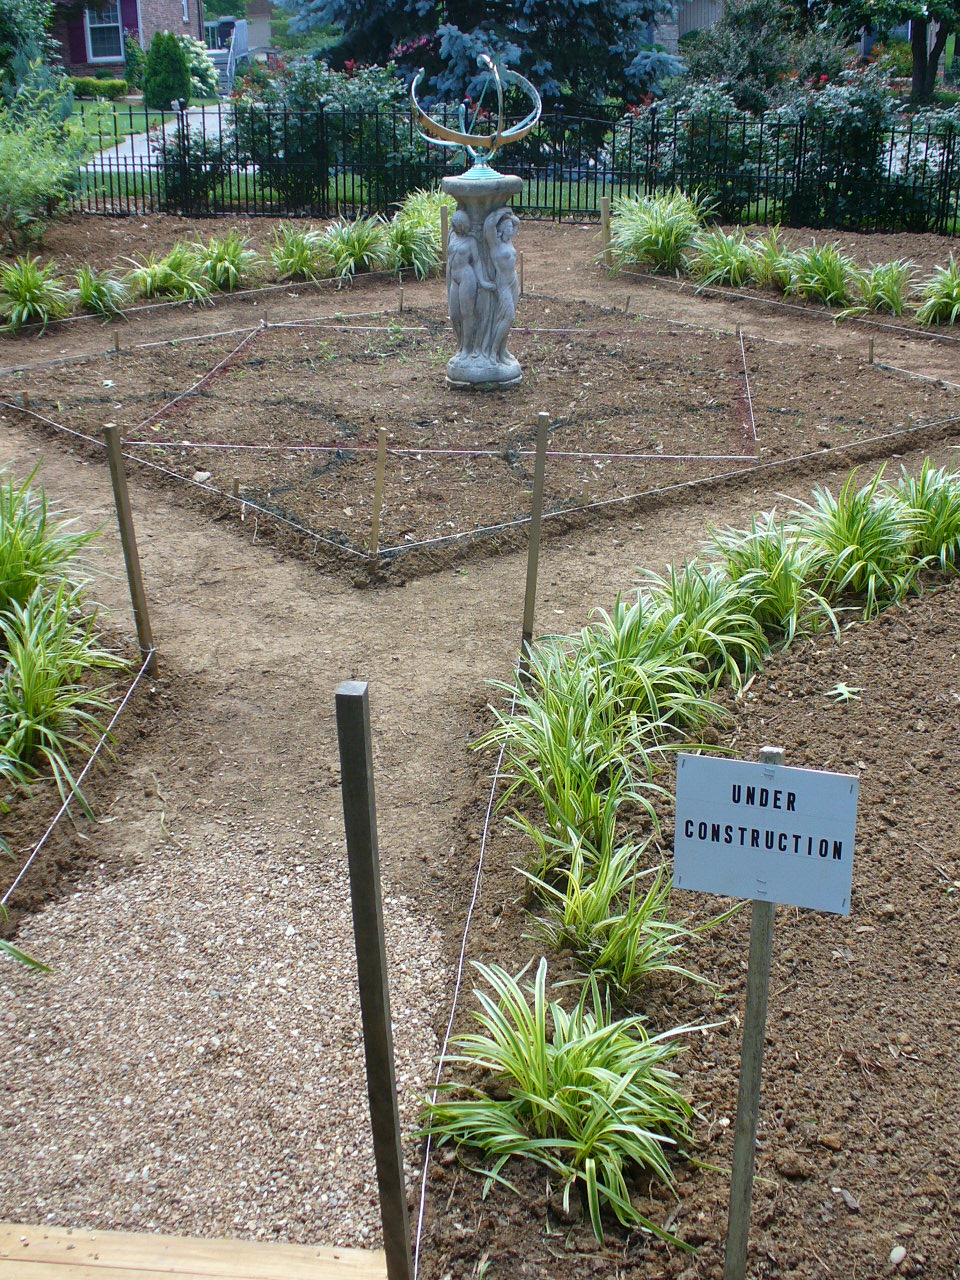
6) Locate a source for your knot plants. I bought mine on Ebay as “liners” – tiny plants no more than a few inches tall, shipped with their roots wrapped in wet paper towels. You may have to go to a nursery and order if you can’t find what you want online. After they arrive plant them in the knot pattern. I chose to space mine about 6″ apart, and therefore calculated and ordered enough to more than fill the total linear feet of each knot segment. They will grow together over time and give you the desired effect. Make sure to mulch around them and water frequently to keep them alive while they get established.
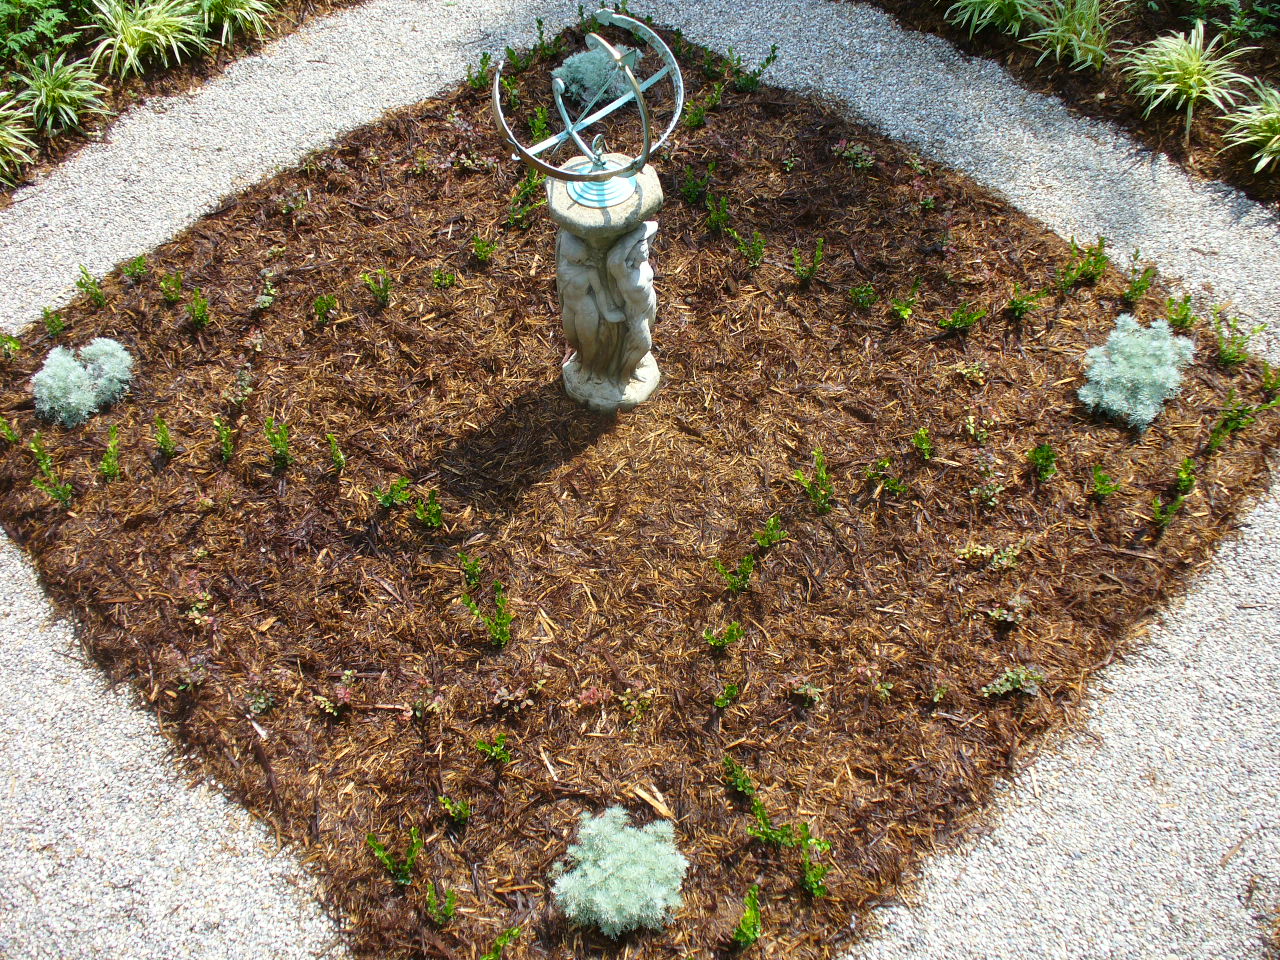
Here’s a photo after planting and mulching – July 2010. The plants are hard to see because they’re so small at this point. Silver mound anchors the four corner openings:
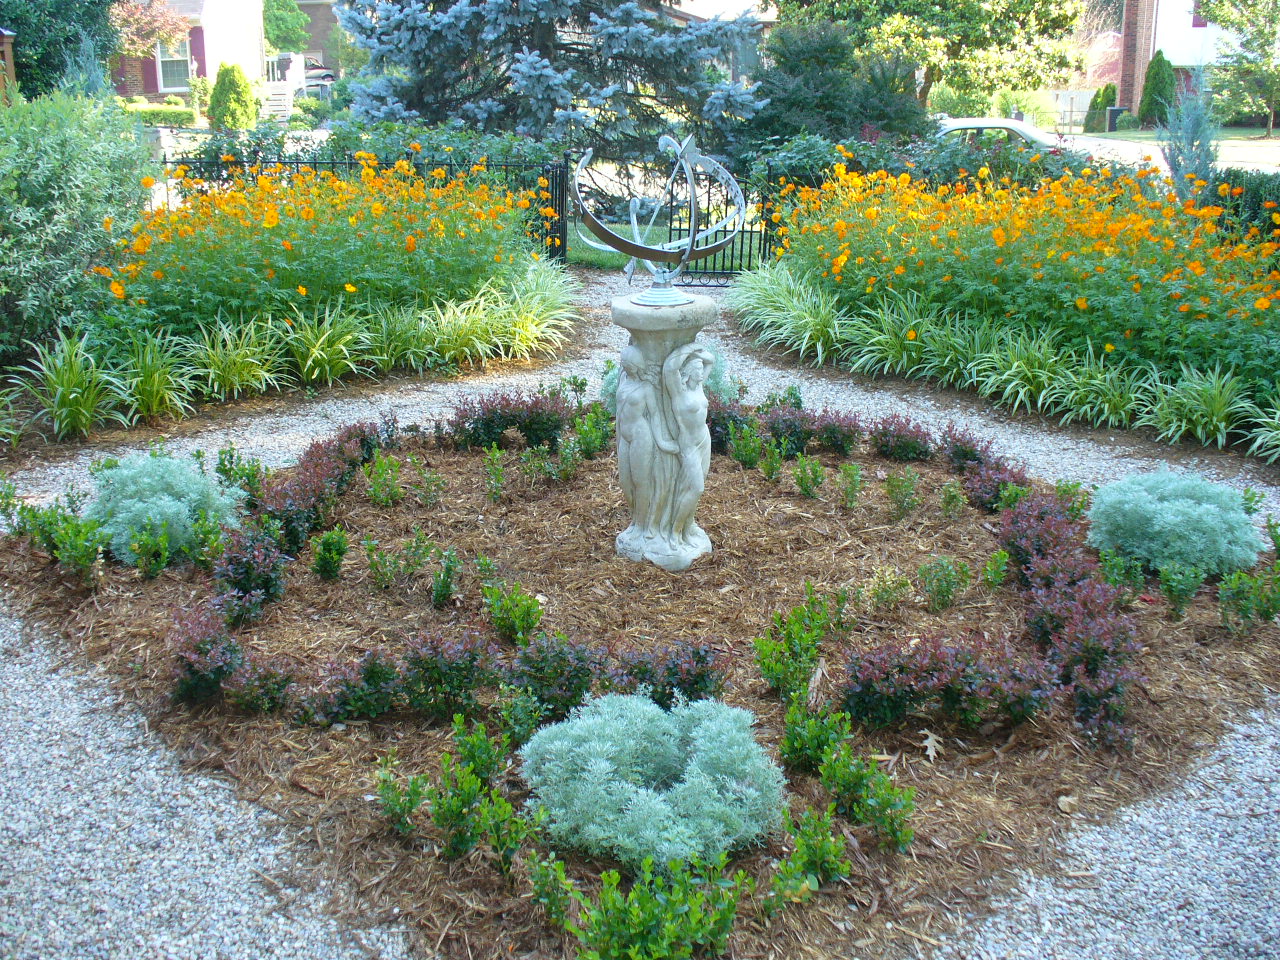
A year later – 2011. We planted gold Cosmos to fill in the four parterres:
Two years after planting – 2012. The gaps between individual plants are almost filled. It’s getting there! I added aluminum Permaloc landscape edging to better define and segregate the pea gravel sidewalks from the garden beds and their mulch.

Three years after planting – 2013. Finally the gaps between plants are closed and it has the ribbon effect I’m after! We eliminated the Cosmos as they were dying out and becoming a mess, with volunteers growing up in the sidewalk. Late season choice to plant potato vine in the parterres:

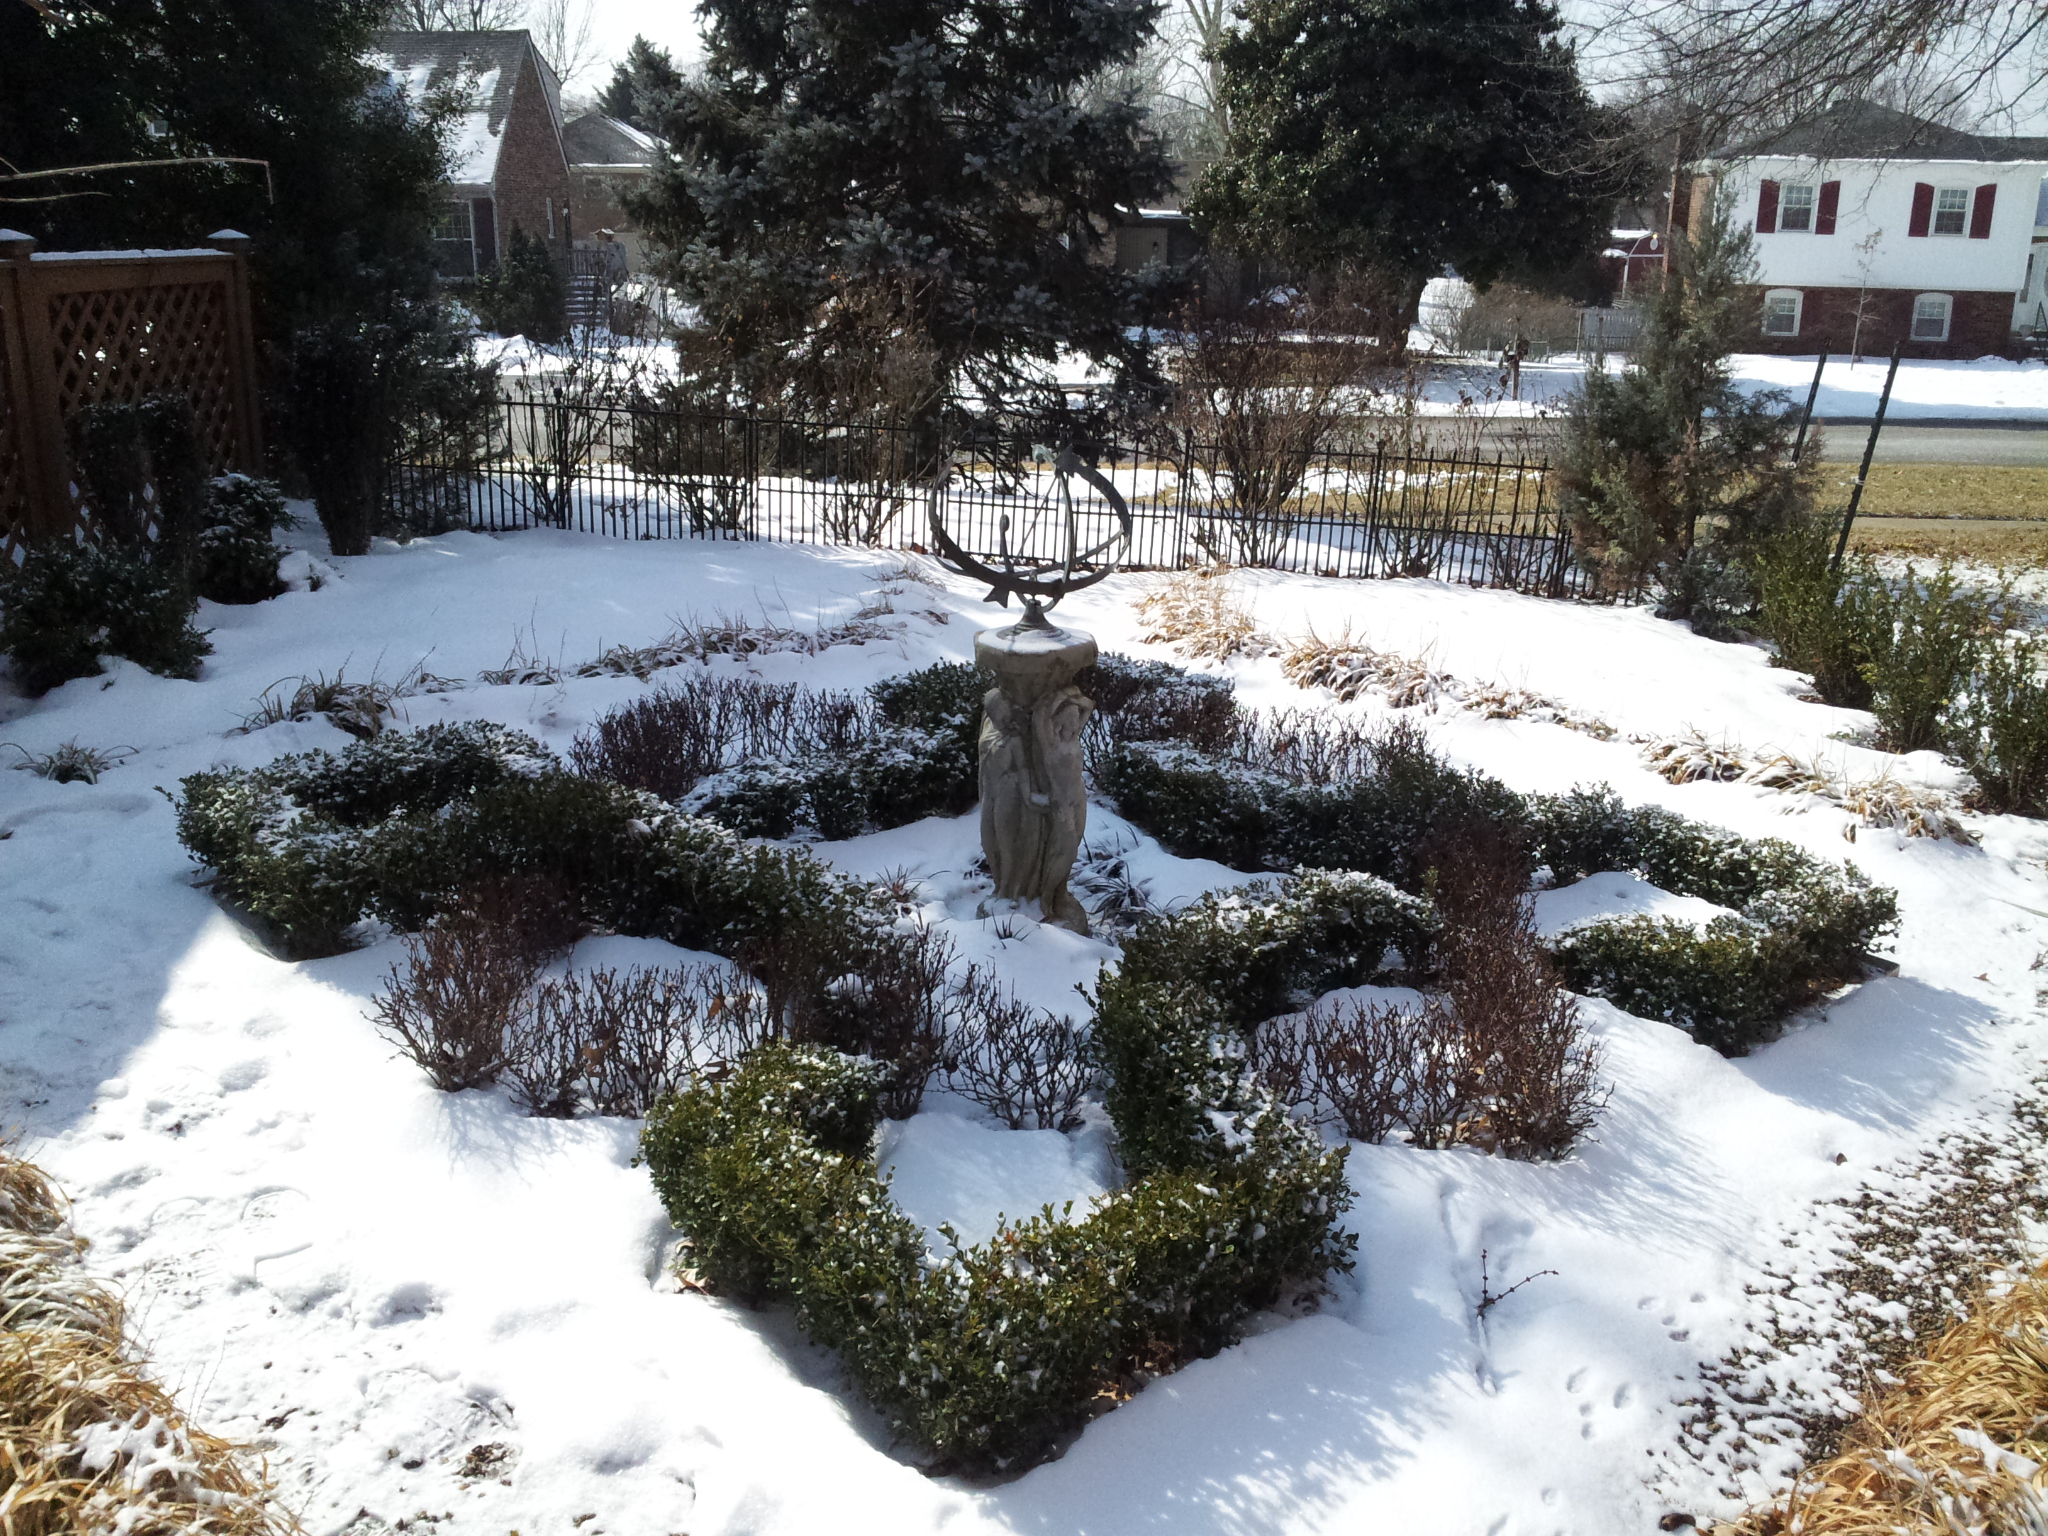
Four years after initial creation – 2014 (winter shot):
Five years old – 2015. Decided to try Wave Petunias in the parterres:
Shot from the roof (at an odd angle) – Late fall 2015. My neighbor next door tells me they love looking down on it year-round from their second story window!
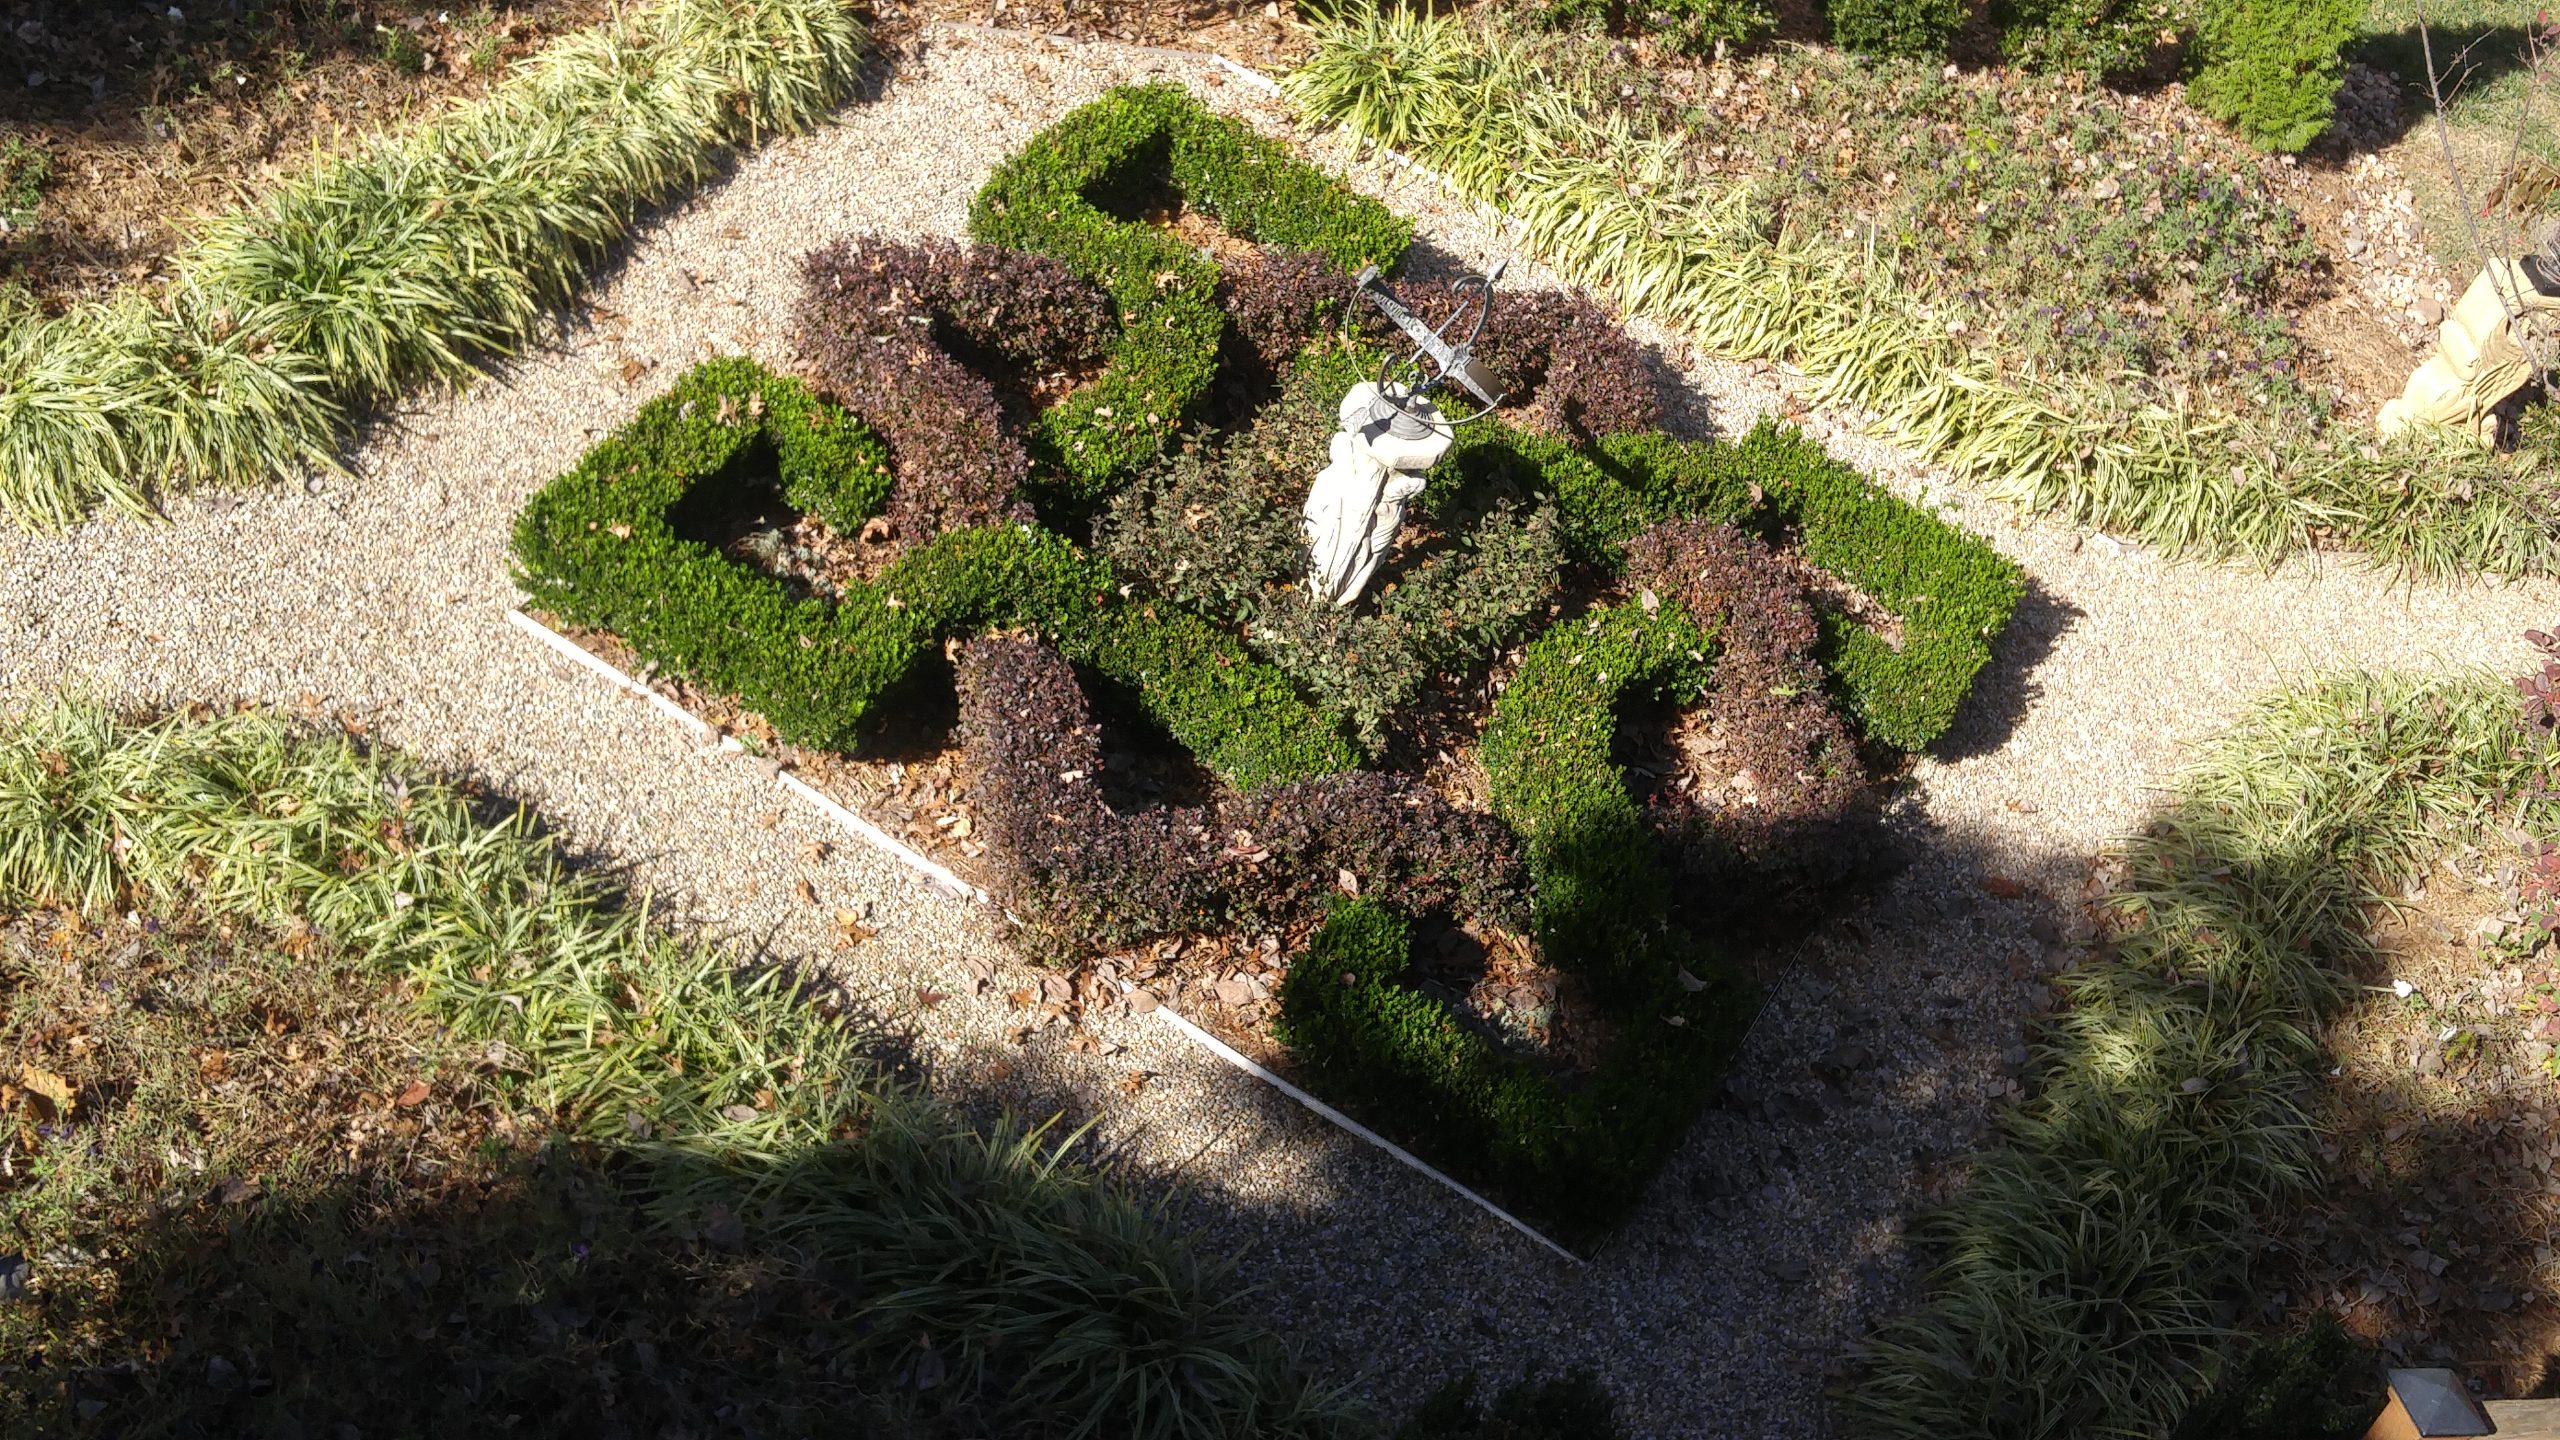
Six years old and in need of trimming – 2016. I trim the knot about 3 to 4 times a year. The pygmy barberry grows at a faster pace than the boxwoods. We tried Wax Begonias in the parterres this year.
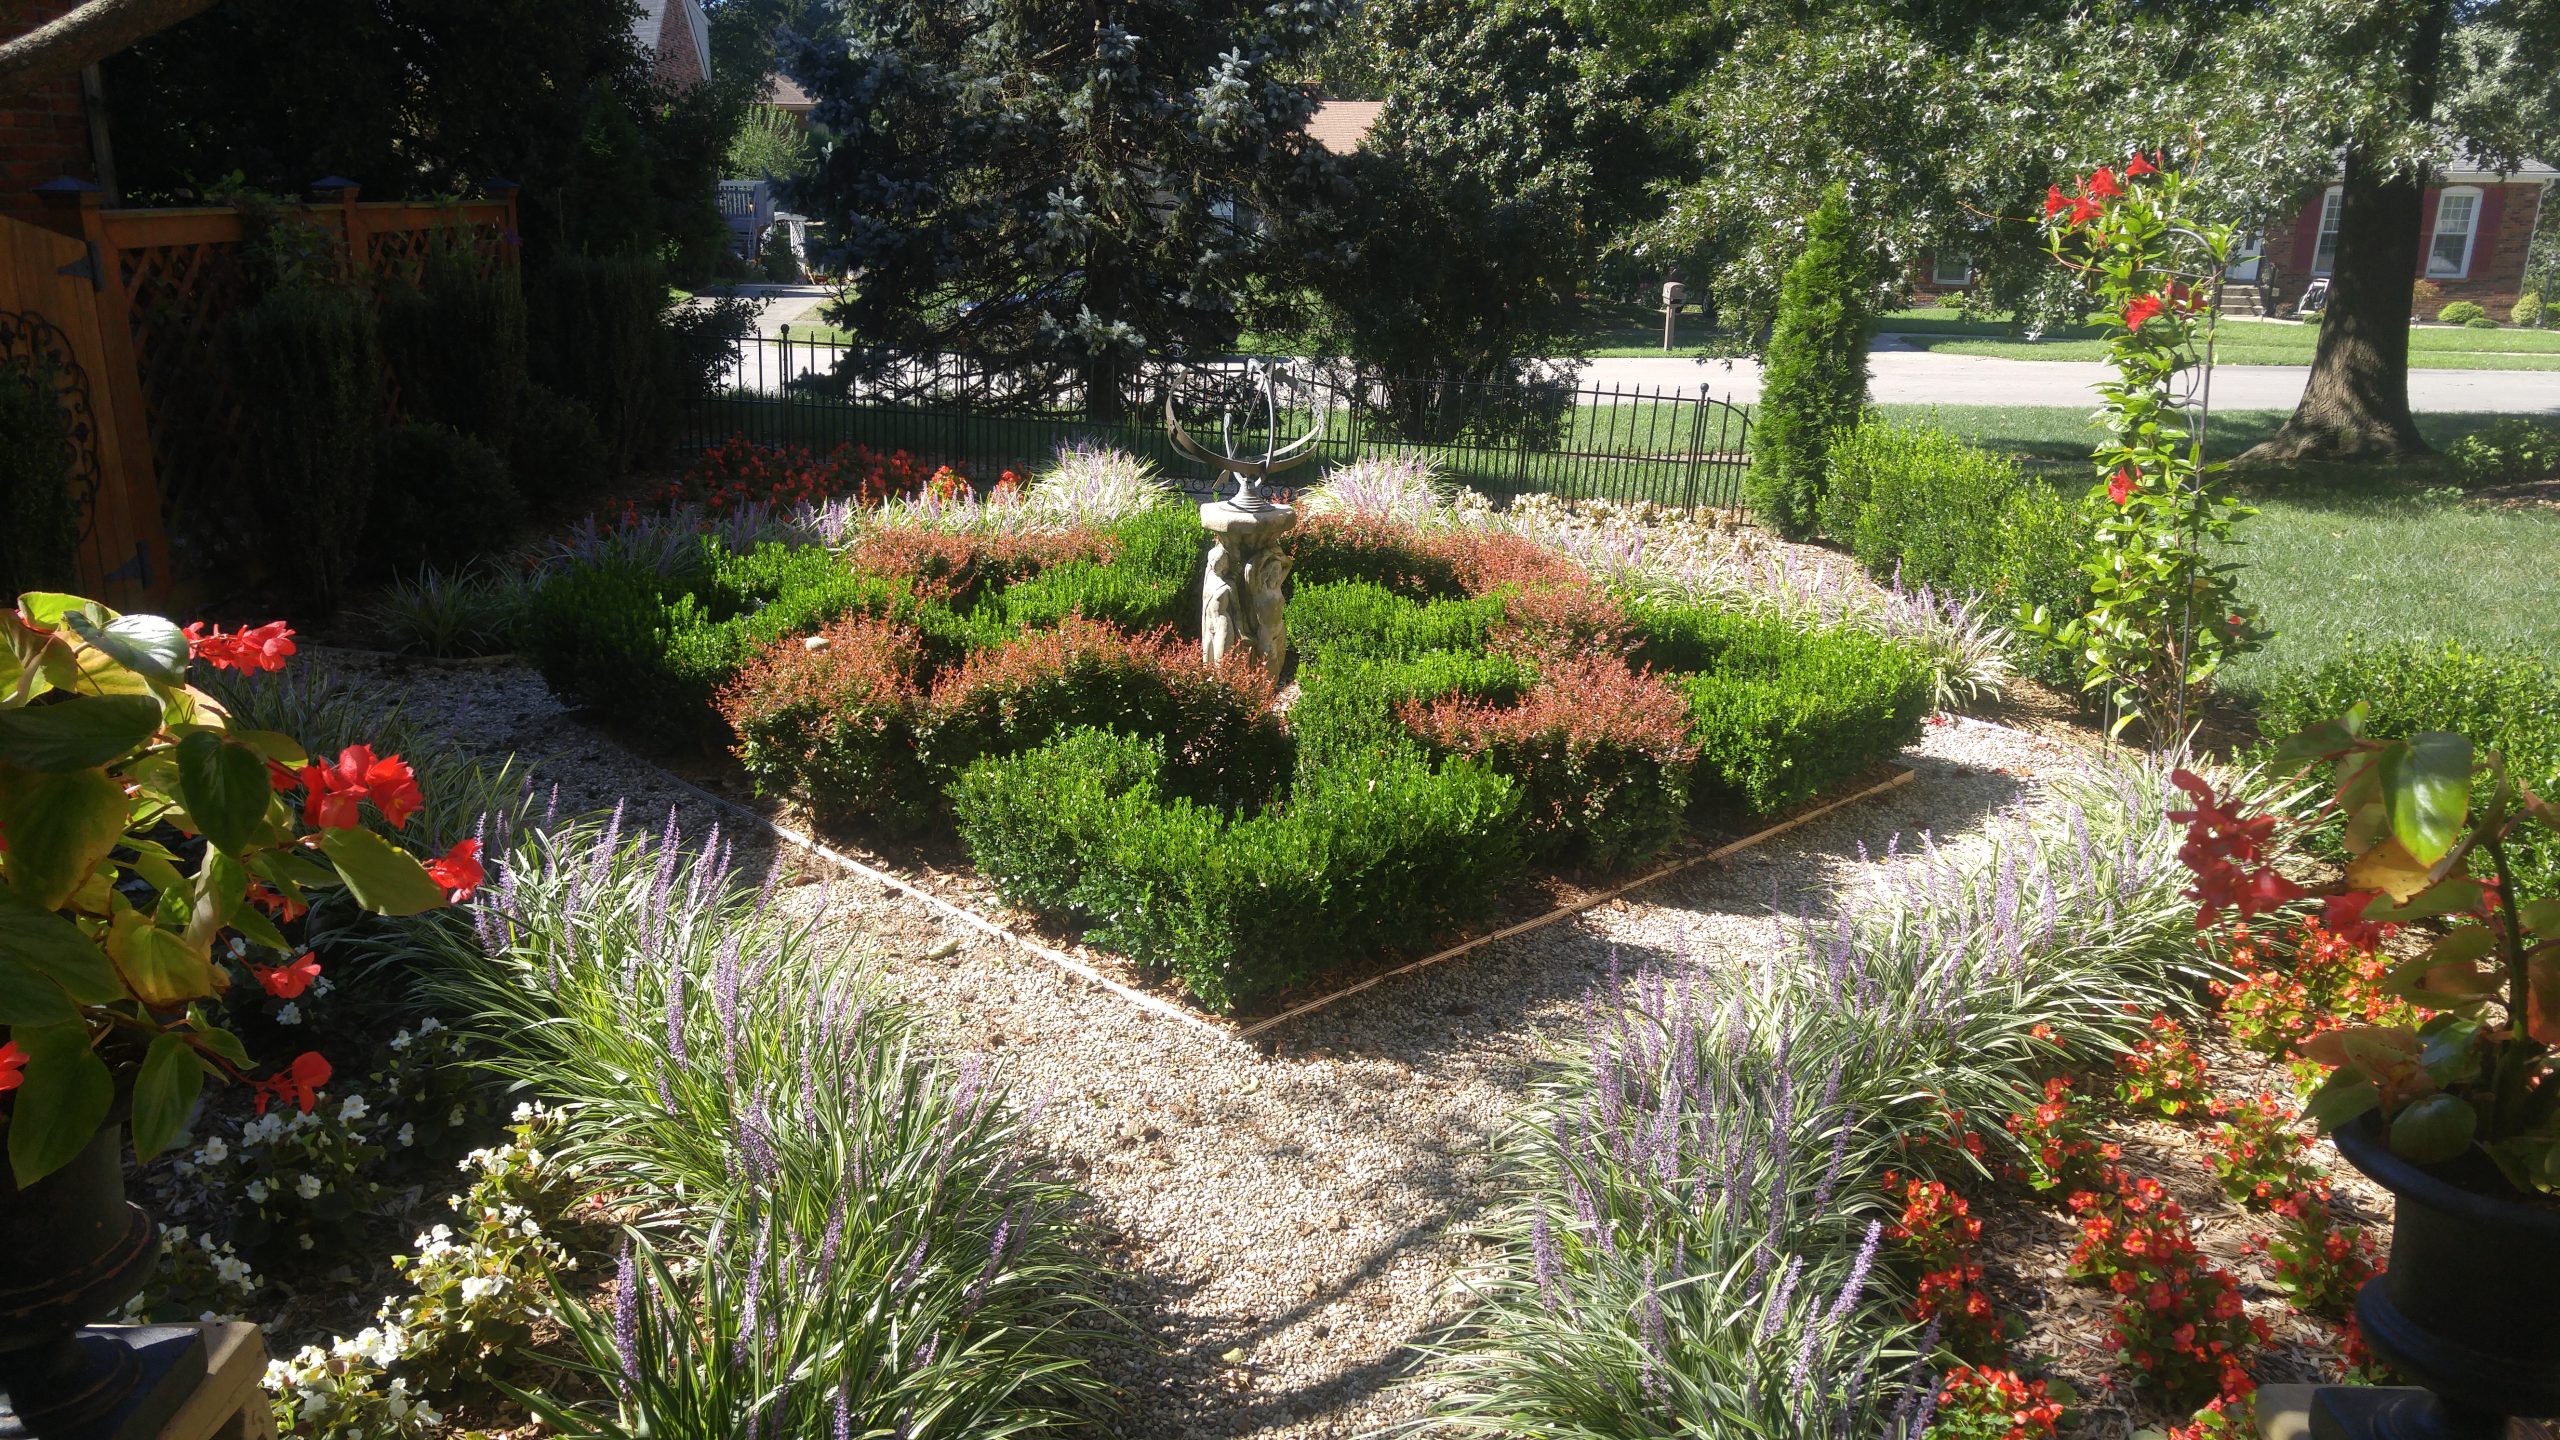
I love the result of our work! It’s such an impressive, beautiful and tranquil place to visit. In fact it’s nearly a secret garden. Because the house is up on a slight hill not much of it can be seen from the road and sidewalk in the front. And it’s tucked around the deck and shade garden in the backyard, so you can’t see it unless you walk down the stepping stone sidewalk past the pond and deck and happen to notice it on the left..
We’re still experimenting with the annuals we want for the parterres. The Wave Petunias were nice, but have a somewhat haphazard way of spreading – filling some areas between plants and not others. The Wax Begonias would be better if we planted more of them, closer together and start them earlier in the season so they have time to spread and fill.
A couple of years ago my daughter and her fiance bought me two heavy antique concrete winged-rams (of Jason & the Argonauts golden fleece fame). I decided to locate them on either side of the entrance to the garden and place a potted Dragon Winged Begonia on each. It has a nice effect.
Tackling a project like this isn’t something I would recommend to anyone. But if the idea appeals to you – to create unique and impressive beauty around your existence – then start somewhere. It can even be done in steps. Perhaps create the knot only first, then add sidewalks and other plant beds around it as time passes. The world is full of possibilities and creativity if we only choose to pursue it and make it a priority!
Create something meaningful and appealing to you. Immerse yourself in beauty. Let it satiate your soul.
(All images by the Author: James L. Patterson)